
I had the most horrible experience trying to setup a verified publisher with my Entra External ID. Now I am writing a blog post about it, in case someone else like me is pulling their hair; probably future me finding this post through DuckDuckGo.
Why do you want a verified publisher with your Entra External ID Application Registration?
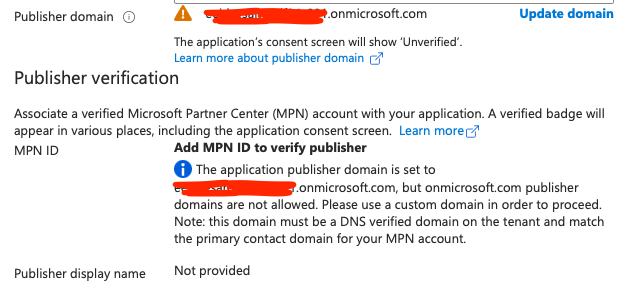
What happens if you don’t get a verified publisher? When your users are going to register to your application, they will give consent on the data being shared with the application, and there it will say that the application is not trusted.
For dev/test environments this doesn’t matter much, but for production environment and real users, this is a big deal. So you need to get a trusted verified publisher to your login. This article is going to explain how to do that.
Why was this so hard?
There are several things that made this much harder than it should’ve been
- Documentation takes for granted you’re doing this on your main Entra ID tenant and not Entra External ID
- Most examples are using the same domain for the tenant as for the Partner Network registration
- The UI is very confusing and sometimes buggy
So you should read this article if you
- Want to setup a verified publisher for an Entra External ID
- You want to use a completely different domain for your tenant
- Want som help navigating the disturbingly convoluted UI
1. Register for Microsoft Partner Center
If you have a small startup like mine, you are probably not registered with Microsoft Partner Network. That is fine, you go here and start the onboarding.
I was not anticipating having this much trouble that I wanted to write a blog post about it, so I didn’t document the process, but it was pretty straightforward.
2. Associate the Entra External ID tenant with your Microsoft Partnership
There is an issue that I don’t think that Microsoft have thought about. In a big enterprise organization this is not a problem, but if you are the same person setting up the Microsoft Partnership as creating the Entra External ID tenant, the association in the Microsoft Partner Central will not work for you.
First you need to setup a Global Administrator account in your Microsoft Entra External ID tenant that is a local account to that tenant. You can use this opportunity to create a “Break The Glass” account that you will need anyway.
Once you’ve done that, log into the Microsoft Partner Center and go to Organization profile / Tenants.
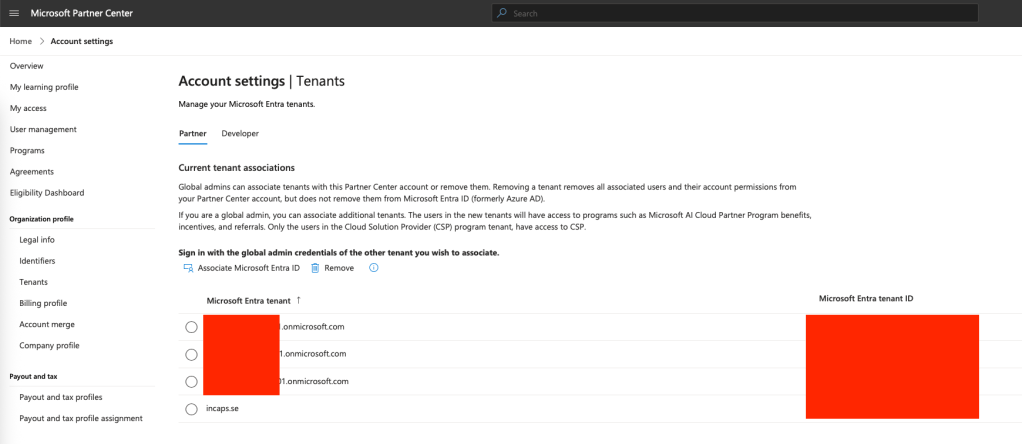
Before you do anything else, take a note on the domain that is already here. This is your publisher domain and you will need it later.
Press the button that says “Associate Microsoft Entra ID” and then you login with your “Break The Glass” account, that is not the same account that you used to authenticate to the Microsoft Partner Center.
If everything goes well you will have your Entra External ID as an associated tenant.
Also make sure that you note down the MPN ID from the account settings. There are 2 different numbers and you want the Global one.
3. Setup Publisher Verification
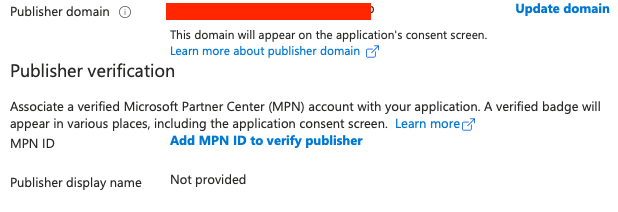
Log back into your Entra External ID and open the Application Registration that needs publisher verification. Where it says “Publisher domain” click the link that says “Update domain”.
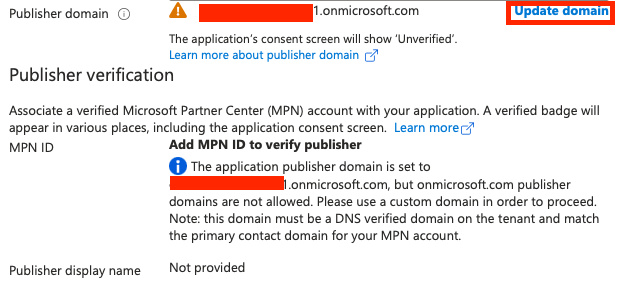
Here is where it will get confusing.
I was under the impression that you first needed to register a custom domain for your tenant, and that you were going to verify that domain, but this is completely unnecessary. You only need a custom domain, if you want to host your Entra External ID on that domain, i.e. make your URL paths look good.
Instead you must select “Verify a new domain” and there you will type in the domain for your MPN account. The one you took note of earlier when you were associating your Entra External ID tenants with your MPN account. This is your publisher domain, and this is what you need to verify in the dialog below.
Again – this has nothing to do with custom domains for your Entra External ID. This verification is only for verifying the publisher domain. This is what had me confused.
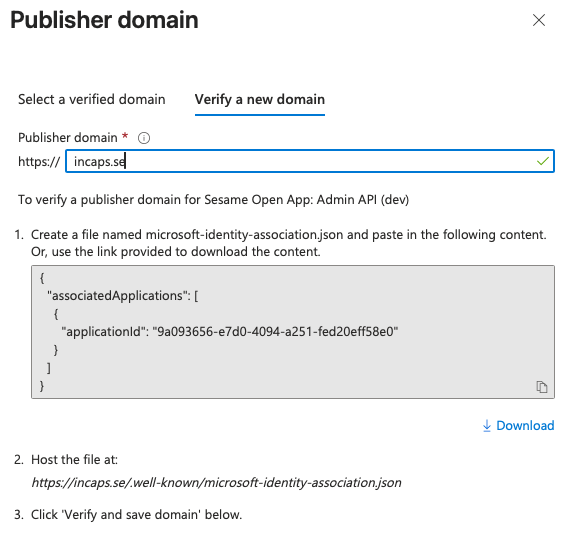
Follow the instructions to verify the domain. It is kind of crazy that you need to upload a file, and cannot verify with DNS records, but I made it work.
Once your domain is verified, you will get a new link to Add MPN ID to verify publisher.
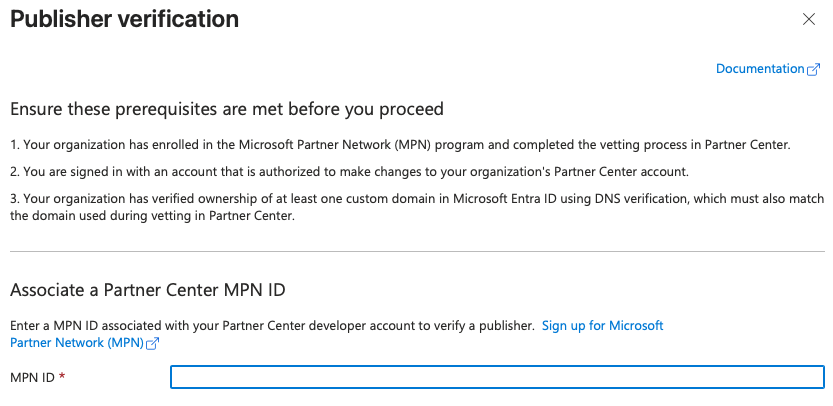
You enter the MPN ID that you saved earlier and with a bit of luck, you should get a confirmation that you have confirmed your publisher status.
I hope this was any help to someone that’s in the same predicament as I was, registering a verified publisher on an Entra External ID tenant.

